User volumes (per-user volume assignments / RBAC)
User volumes are nextExplorer’s “RBAC-style” control for mounted data: instead of every authenticated user seeing every volume, admins explicitly assign each user a set of allowed directories, each with read-only or read/write access.
When USER_VOLUMES=true, nextExplorer stops showing all mounted volumes to everyone. Admins still see all volumes under VOLUME_ROOT, but non-admin users only see volumes that an admin assigned to their profile.
Enable user volumes
- Set the environment variable and restart the container:
USER_VOLUMES=true- After restart, refresh the app so the frontend picks up the feature flag.
How it works (behavior)
- Admins: continue to see all volumes mounted under
VOLUME_ROOT(default/mnt). - Non-admin users: see only the volumes assigned to them (and cannot access unassigned volumes even via a direct URL).
- No assignments = no volumes: if a user has no assigned volumes, they’ll see an empty volume list.
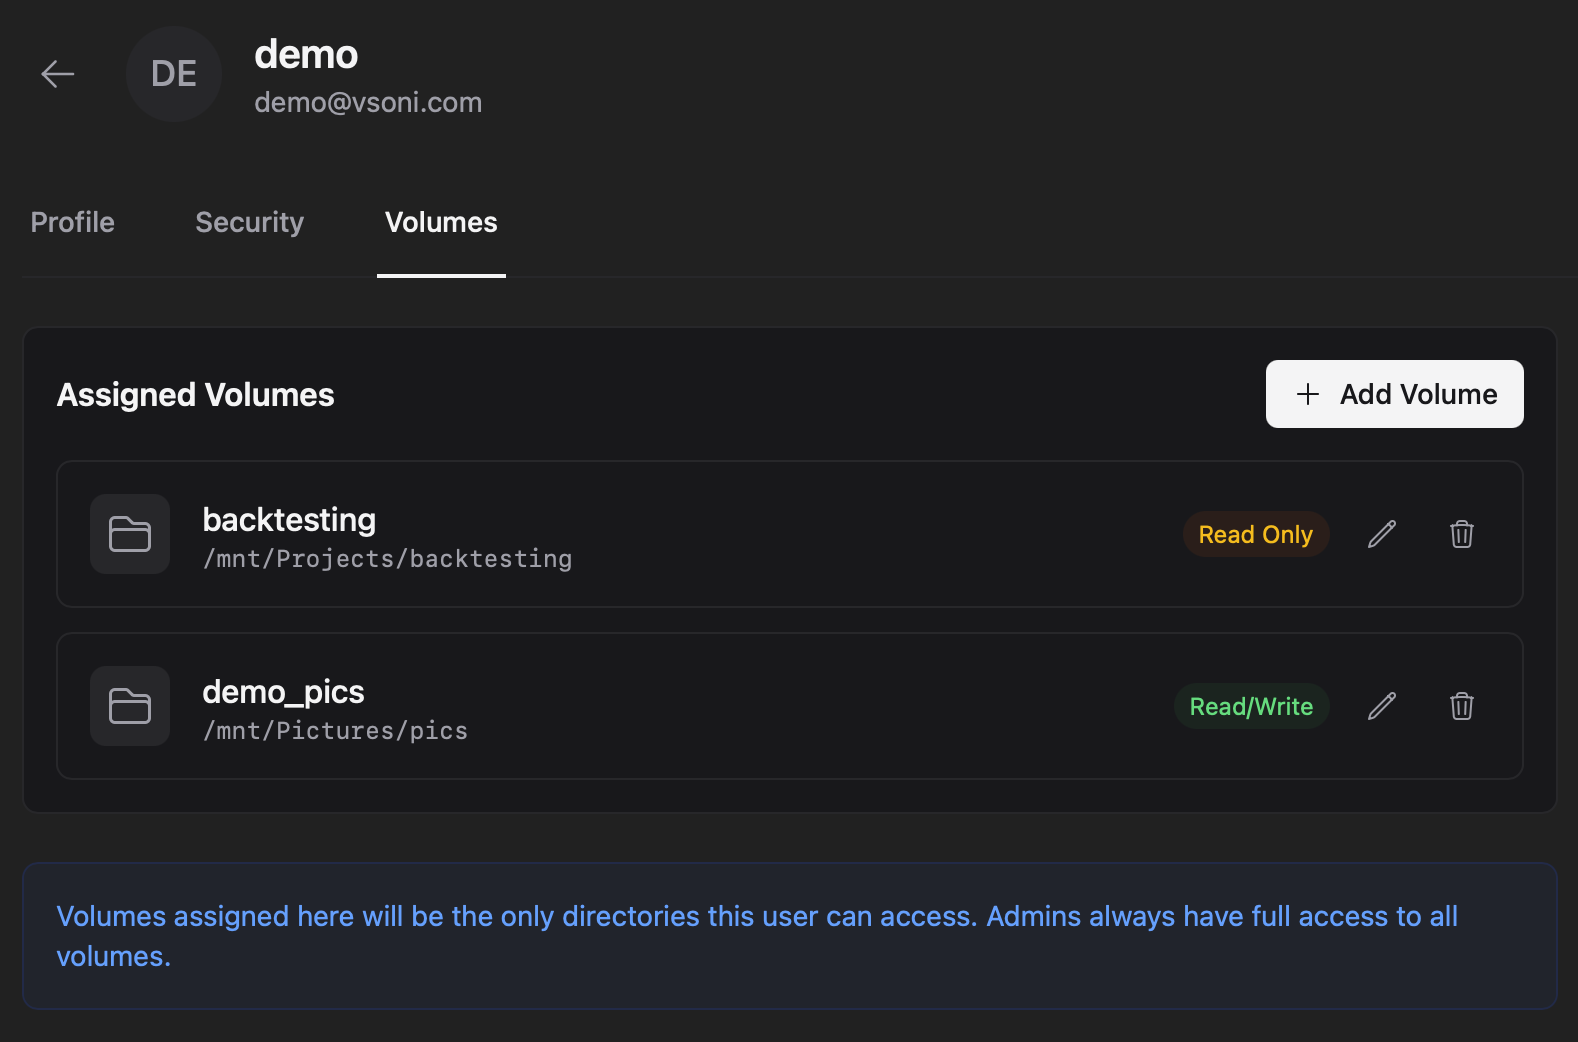
Each assignment creates a top-level entry in the user’s sidebar using the assignment’s Label (not the underlying folder name). Users navigate by that label; nextExplorer maps the label to the real server path behind the scenes.
Set up users with custom permissions (admin)
1) Mount your data under VOLUME_ROOT
Make sure the directories you want to expose exist inside the container and are readable/writable by the container user as appropriate.
Typical pattern:
VOLUME_ROOT=/mnt- Mount team folders as subdirectories under
/mnt(e.g.,/mnt/Projects,/mnt/Media,/mnt/Finance)
2) Create or pick a user profile
Go to Settings → Admin → Users, then:
- Select an existing user profile, or
- Create a new local user profile (so you can pre-assign volumes before their first login)
3) Assign volumes (label + directory + access)
- Open the user profile.
- Open the Volumes tab.
- Click Add volume.
- Browse to the directory to assign, choose an access mode, and save.
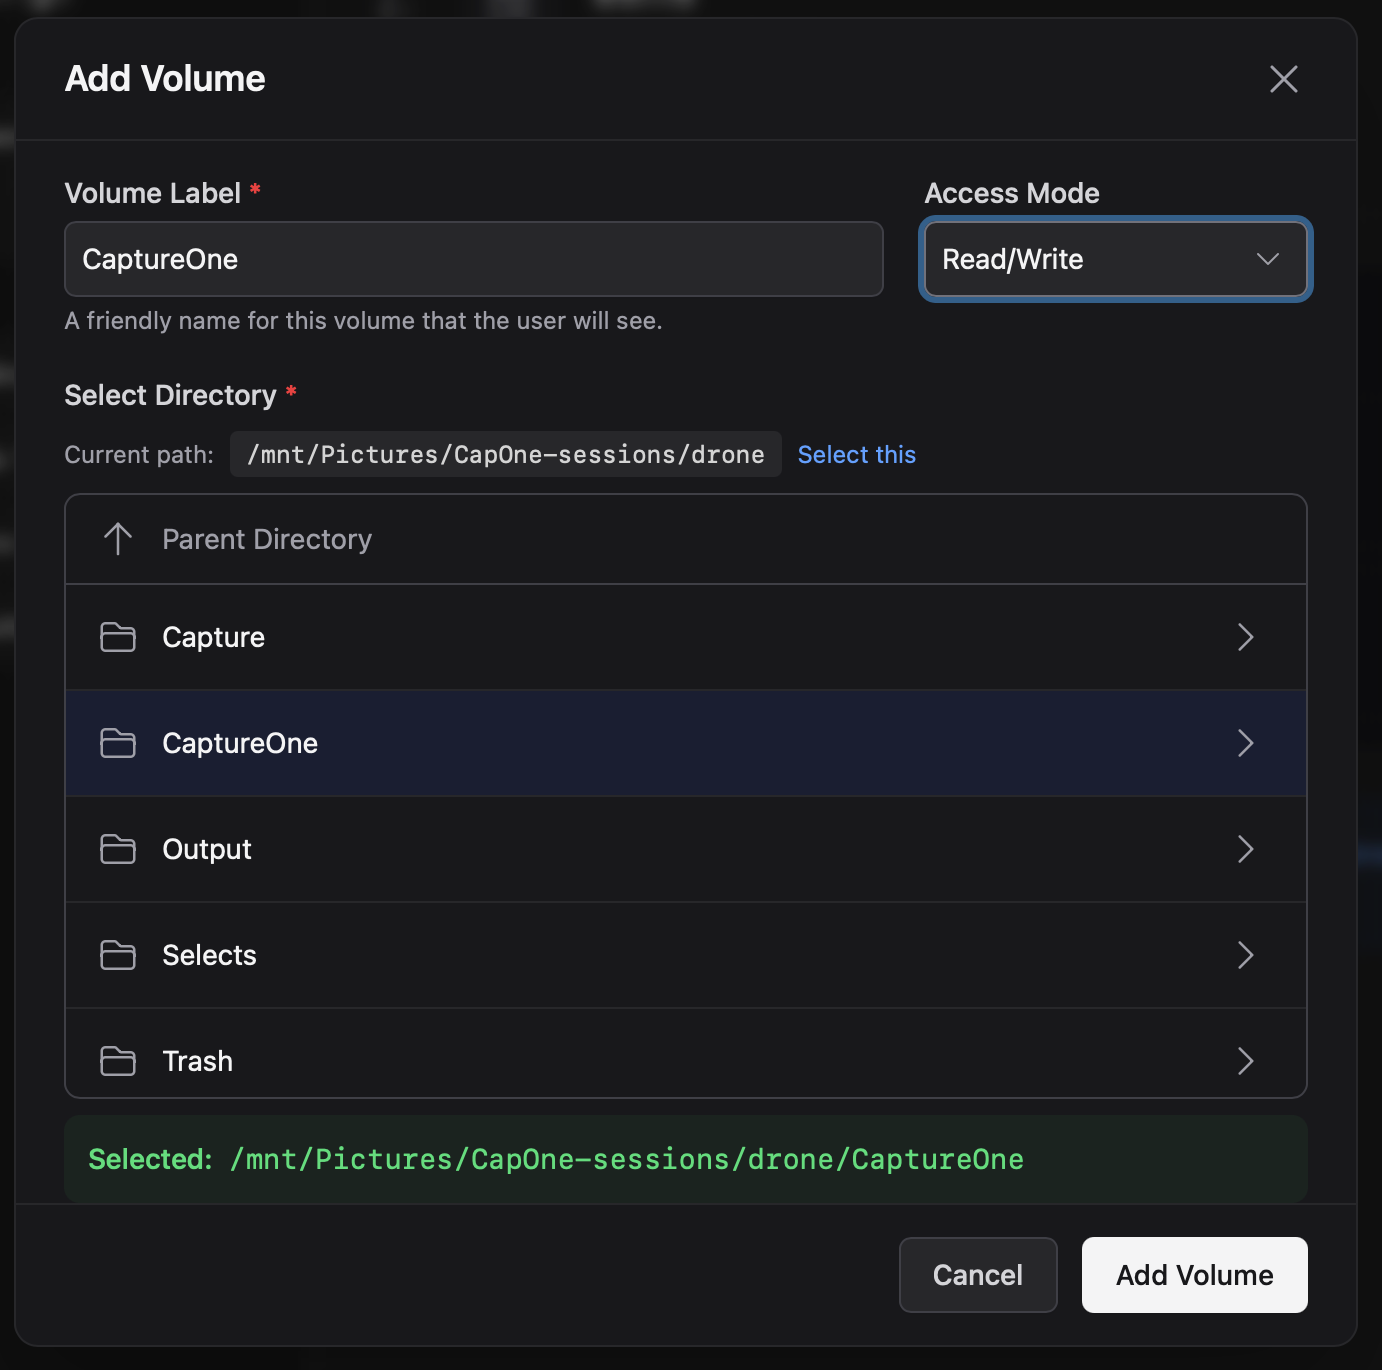
Volume fields
- Label (required): what the user sees in the sidebar.
- Must be unique per user.
- Avoid changing it later: it becomes the “root” of the user’s logical paths.
- Reserved labels are not allowed:
personal,share,volumes.
- Directory (required): an existing directory path on the server/container.
- Must exist and be accessible to the nextExplorer container process.
- In the UI, the directory picker starts at
VOLUME_ROOT, hides dot-directories, and excludes reserved/system names like_users.
- Access mode:
readwrite: user can upload, create folders, rename, move, and delete.readonly: user can browse and download, but cannot modify content.
4) Edit or revoke access later
- To change a volume’s Label or Access mode, use Edit on the volume entry.
- To change the Directory, remove the volume and add it again (the directory is chosen during “Add volume”).
Interactions with other access controls
- Folder Rules (Access Control) still apply: if you set a path to
roorhiddenin Settings → Access Control, those restrictions apply on top of user-volume assignments.- Example: A user-volume set to
readwritecan still become read-only under a folder rule. - Example: A
hiddenrule can hide a path even if the user has the volume assigned.
- Example: A user-volume set to
- Shares can’t elevate permissions: a share link can’t grant write access if the underlying path is effectively read-only (due to a user-volume being
readonlyor a folder rule marking itro).
Troubleshooting
- Volumes tab missing: confirm
USER_VOLUMES=true, restart the container, and refresh the app (feature flags are loaded from/api/features). - User sees no volumes: verify at least one volume is assigned to the user.
- User can’t access a volume by URL: confirm the volume is assigned and that the user is navigating via the correct Label (the label is the visible “volume name” for that user).
- “Path does not exist or is not accessible”: the backend can’t read the directory; fix your mounts and filesystem permissions and try again.